Showing posts with label Ubuntu. Show all posts

Monday, September 22, 2014

how to install openfire chat server 3.9.3 with external mysql database in ubuntu


Openfire (previously known as Wildfire, and Jive Messenger) is an instant messaging (IM) and groupchat server that uses XMPP server written in Java and licensed under the Apache License 2.0
Follow the steps below to install Open Fire 3.9.3 with embedded databases in Ubuntu.

Step 1. Update your server
  • SSH your server as root user or use sudo
  • sudo apt-get update
  • sudo apt-get upgrade

Step 2.  Install latest version of Oracle JRE/JDK.
  • sudo apt-get install python-software-properties
  • sudo add-apt-repository ppa:webupd8team/java
  • sudo apt-get update

Step 3. If you are already using OpenJDK, remove it to minimize any Java conflicts.
  • sudo apt-get remove --purge openjdk*

Step 4. Then install Oracle Java 7 version.
  • sudo apt-get install oracle-java7-installer

Step 5. Install MySql Database server
  • sudo apt-get install mysql-server
  • sudo mysql -u root -p
  • mysql> CREATE DATABASE dbopenfire CHARACTER SET='utf8';
  • mysql> CREATE USER 'openfire'@'localhost' IDENTIFIED BY 'openfirepwd';
  • mysql> GRANT ALL PRIVILEGES ON dbopenfire.* TO openfire@localhost WITH GRANT OPTION;
  • mysql> FLUSH PRIVILEGES;
  • mysql> quit
Step 6. Download and Install openfire 3.9.3
  • cd /tmp
  • wget http://download.igniterealtime.org/openfire/openfire_3.9.3_all.deb
  • dpkg -i openfire_3.9.3_all.deb
if you are facing any issue in wget download the deb package from the link 

Ignore all installation errors regarding user and folder permissions.it cause depending on your version of JRE/JDK.
  •  vi /etc/init/d/openfire
 If there is no such file created the move to the next step else you need to edit file and replace java-6-sun with java-6-oracle or java-7-oracle . 
  • Replace java-6-sun with java-6-oracle or java-7-oracle
  • sudo apt-get install rpl
  • sudo rpl '6-sun' '7-oracle' /etc/init.d/openfire
  • sudo service openfire start

Step 7. Allow ports for Openfire as they are used.
  • sudo ufw allow 9090/tcp
  • sudo ufw allow 9091/tcp
  • sudo ufw allow 5222/tcp
  • sudo ufw allow 7777/tcp
  • sudo ufw allow 7443/tcp
  • sudo ufw allow 7070/tcp
  • sudo ufw allow 3478/tcp
  • sudo ufw allow 3479/tcp


Sunday, June 01, 2014

how to install openfire IM chat server 3.9.3 with embedded database in ubuntu


Openfire (previously known as Wildfire, and Jive Messenger) is an instant messaging (IM) and groupchat server that uses XMPP server written in Java and licensed under the Apache License 2.0
Follow the steps below to install Open Fire 3.9.3 with embedded databases in Ubuntu.

Step 1. Update your server
  • SSH your server as root user or use sudo
  • sudo apt-get update
  • sudo apt-get upgrade

Step 2.  Install latest version of Oracle JRE/JDK.
  • sudo apt-get install python-software-properties
  • sudo add-apt-repository ppa:webupd8team/java
  • sudo apt-get update

Step 3. If you are already using OpenJDK, remove it to minimize any Java conflicts.
  • sudo apt-get remove --purge openjdk*

Step 4. Then install Oracle Java 7 version.
  • sudo apt-get install oracle-java7-installer

Step 5. Download and Install openfire 3.9.3
  • cd /tmp
  • wget http://download.igniterealtime.org/openfire/openfire_3.9.3_all.deb
  • dpkg -i openfire_3.9.3_all.deb
if you are facing any issue in wget download the deb package from the link 

Ignore all installation errors regarding user and folder permissions.it cause depending on your version of JRE/JDK.
  •  vi /etc/init/d/openfire
 If there is no such file created the move to the next step else you need to edit file and replace java-6-sun with java-6-oracle or java-7-oracle . 
  • Replace java-6-sun with java-6-oracle or java-7-oracle
  • sudo apt-get install rpl
  • sudo rpl '6-sun' '7-oracle' /etc/init.d/openfire
  • sudo service openfire start

Step 6. Allow ports for Openfire as they are used.
  • sudo ufw allow 9090/tcp
  • sudo ufw allow 9091/tcp
  • sudo ufw allow 5222/tcp
  • sudo ufw allow 7777/tcp
  • sudo ufw allow 7443/tcp
  • sudo ufw allow 7070/tcp
  • sudo ufw allow 3478/tcp
  • sudo ufw allow 3479/tcp

Step7. Open http://ServerIP:9090/ in your browser to start the configuration
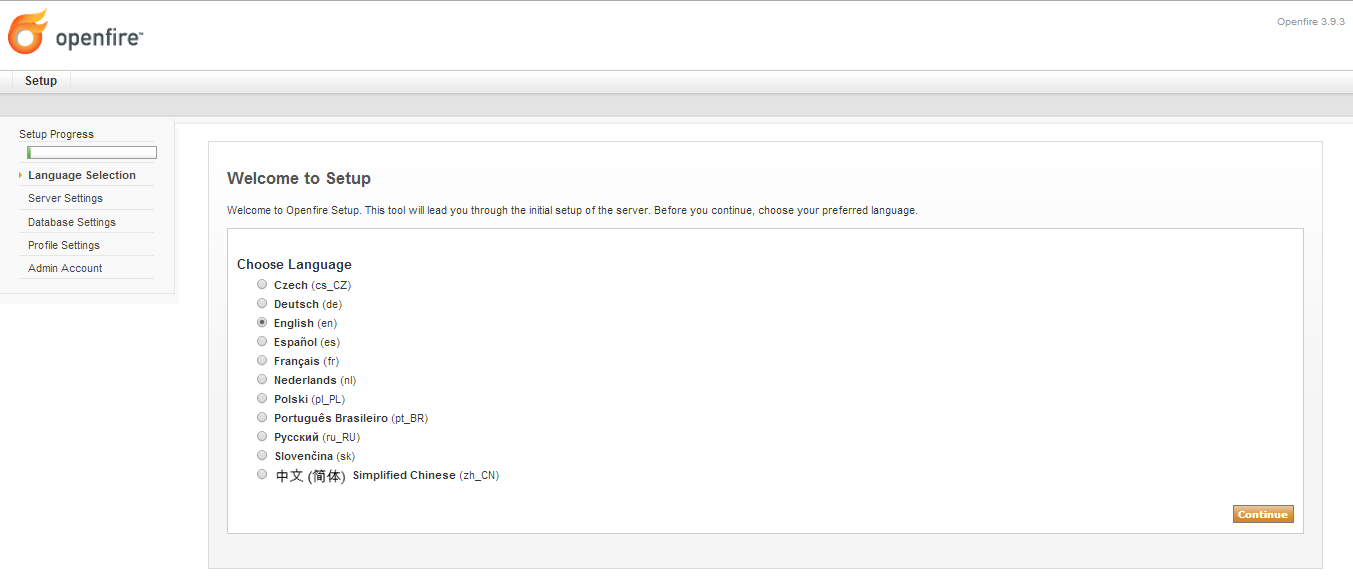
  • Choose the language as per your requirement.
  • Mention the domain name
  • Select Embedded database
  • Mention your email-Id and set the new password ill suggest you to set it to User: admin Password : admin
  • Once the setup is completed use admin as user-name & password to login and then change you admin password as a safety precaution.


Tuesday, May 27, 2014

How to install X2GO in ubuntu 12.04 server

Using X2GO you can access your desktop using another computer's internet connections i.e it provides remote access to the machine. The transmission is done using the ssh protocol, so it is encrypted. Very acceptable performance in both speed and responsiveness is achieved. 


Follow the steps below to install X2GO in ubuntu 12.04 server
  • SSH server as root user or use sudo
1) Install GUI environment for X2GO
  • sudo apt-get install gnome
2) we also need to install python
  • sudo apt-get install python-software-properties
3) Add x2go repository
  • sudo add-apt-repository ppa:x2go/stable
4) update your package information with newly added repository
  • sudo apt-get update
5) Install the x2go server:
  • sudo apt-get install x2goserver x2goserver-xsession

Tuesday, February 25, 2014

How to install webmin 1.670 control panel in ubuntu

Webmin control panel is a web-based interface for system administration and provides a user friendly interface using which you can setup user accounts, Apache, DNS, file sharing and much more, To install Webmin control panel in ubuntu Operating system follow the steps below.

SSH your server 

If you are not a super user make your self super user using command sudo.


  • Firstly update your server
  • apt-get update
  • apt-get upgrade
  • apt-get dist-upgrade
  • Time to Install webmin control panel
  • wget http://prdownloads.sourceforge.net/webadmin/webmin_1.670_all.deb
If there are errors then type the following commands to resolve these errors.
  • sudo dpkg -i webmin_1.670_all.deb
Run the following command to install webmin control panel.
  • sudo apt-get install -f
  • http://yourip:10000/
*Note 10000 is port no of Webmin control panel.

Friday, January 03, 2014

How to set timezone in ubuntu server

A Time zone is a region that has a uniform standard time for legal, commercial, and social purposes. It is convenient for areas in close commercial or other communication to keep the same time, so time zones tend to follow the boundaries of countries and their subdivisions.

To set the time zone in ubuntu server follow the steps below in this demonstration i will be setting the the time zone to newyork america.

Run the command below.
  • dpkg-reconfigure tzdata
It will popup a screen like below, Select a country in that popup.


Click ok then it will popup another screen asking for city corresponding to time zone select city.


Using the command below you can check the current time.
  • date

Thursday, September 19, 2013

How to Install wowza media server in ubuntu

To install wowza follow the steps below.
  • apt-get update
  • apt-get install openjdk-7-jre-headless
  • java -version
  • wget http://www.wowza.com/downloads/WowzaMediaServer-3-5-2/WowzaMediaServer-3.5.2.deb.bin
  • chmod +x WowzaMediaServer-3.5.2.deb.bin
press shift shift


yes

enter key
  • cd /usr/local/WowzaMediaServer/bin
  • ./startup.sh
run on browser <IP>:1935


If You are using a firewall, You need open the port: 1935. Type the following command if You are using iptables


iptables -I INPUT -p tcp --dport 1935 -j ACCEPT

Sunday, September 15, 2013

How to change Hostname of a Linux server


Steps
1) Run command: hostname to check the current hostname

To set new hostname Run below Command


hostname new_server_name
2) Modify the hostname in file: /etc/sysconfig/network

vi /etc/sysconfig/network
3) Modify the hostname in file: /etc/hosts

vi /etc/hosts

Output Will be like 

127.0.0.1   localhost localhost.localdomain localhost4 localhost4.localdomain4

::1         localhost localhost.localdomain localhost6 localhost6.localdomain6
Your-Server-IP   Host-Name 


4)Run the command  service network restart


Sunday, September 08, 2013

How to change SSH port in centOS, Ubuntu.

Default port for SSH is 22 but if we want we can change the default port, To change the port no for SSH follow the steps below.

  • ssh server

  • vi /etc/ssh/sshd_config
search for line port portno (port 22) then change it from here to the port you want.

  • service sshd restart (Do not forget to restart sshd service)